I mentioned in my last post on New Years Resolutions that I was challenging myself to create handmade gifts this year. Easter weekend was crazy in my house because my daughter Hailey and first son Wyatt were born exactly 10 years and 3 days apart and this year their birthdays landed on Easter weekend. It's a good thing I started making their gifts early. Wyatt got a super cute Old MacDonald puppet set and For Hailey I made a zippered and lined Owl purse. Today I'm going to share how I made the purse.
I started looking for gift ideas by googling handmade, teen, DIY, sewing in all different combinations. I landed on a few Owl purses that I thought looked really fun and decided to give it a go. I decided to make two bags at the same time. Since I'm going to try to give handmade gifts all year this gives me an extra present ready to go.
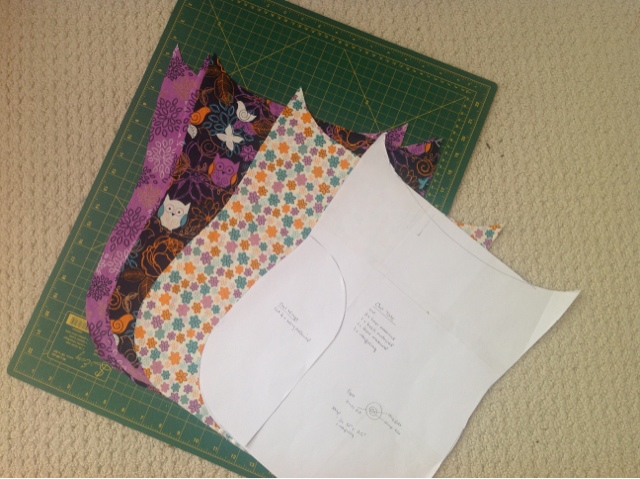
1. I made my own pattern from printer paper taped together. I know you can buy a pattern from one of these sites and if you want to do that I think the prices are pretty reasonable and it takes the guesswork out of sizing and scaling the features, etc. I've made a few bags before so I felt pretty confident I knew what I wanted. I found a cute owl fabric package at Walmart for about $12 with five different but matching patterns. Not the most affordable fabric I've ever purchased but I liked it enough to splurge.
2. With my rotary cutter (just use scissors if you don't have one), I cut out
- 5 layers of the owl body pattern. One for the front, one for the back, two for the lining and one out of a lightweight fusible interfacing.
- Two wings
- Two large circles for eyes, I used pickle jar lids to trace the circle onto the fabric then cut them out with scissors.
- Two medium size circles (I just used a baby food jar lid) and a triangle nose out of orange felt material.
- Two small circles (just eyeball it, pun intended) out of black felt for the pupils.
- Six long strips approximately 2.5 inches by 30 inches for the straps (two out of fabric, two out of a different fabric and two out of interfacing)
- I also bought some thread and a zipper at least an inch longer than the width of the bag. I think mine was 14 inches.
3. To make the front of the bag, the owl face, I first ironed the interfacing onto the wrong side of the front fabric. The interfacing stops the material from stretching and gives it a little bit of stiffness. Then, I just layered on the eyes, nose and wings using a zig zag stitch over the edge of the fabric and a small stitch length. I used a straight stitch on the felt (felt doesn't fray so the edges don't need to be covered by a zig zag).
4. To make the strap, I ironed the interfacing on to the wrong side of the fabric (two pieces) and then sewed the short ends together to make a super long piece. I would have just used a continuous long piece of fabric if I had it but the material I bought were smaller squares. I also sewed the two lining pieces together to make another long strip. Sew the two long pieces with right sides together down their long edges. Trim with zig zag scissors and flip the strap right side out. Iron.
5. With right sides together, sew the owl face to the back, and the inside lining pieces together. Flip the outside bag around and press flat but leave the lining as is.
6. Then I sew on the zipper. I follow the instructions on this blog (http://dilleydally.blogspot.ca/2009/03/wetbag-tutorial.html) because they work really well. The only variation is to make sure your strap is first positioned where you want it. I also had to trim the "ears" of the top of the fabric to make a straight top edge when I couldn't figure out how to put the zipper on the curve. Maybe one day I'll figure it out.
I think it turned out really well. I was afraid it would be to juvenile for a girl turning 13 but Hailey says she likes it. I filled it with candy and an iTunes card so that probably helped.
Lindsay